
Mon monetizar um blog com anúncios é uma daquelas coisas que parecem simples na teoria, mas que rapidamente se tornam complicadas na prática…
Na minha experiência, a parte mais difícil não é colocar os anúncios no ar — é controlar o que acontece depois que eles são configurados. Algo pode parecer bom quando você o coloca pela primeira vez, e depois você percebe que ele muda o layout no celular, empurra o conteúdo de maneiras inesperadas ou interrompe o fluxo de leitura em certas páginas.
Também é comum que anúncios apareçam em lugares que você não planejou, como perto de menus de navegação ou dentro do conteúdo onde não deveriam estar.
É aí que entram os plugins de gerenciamento de anúncios. Pelo que testei, os melhores facilitam muito as coisas, dando a você controle sobre posicionamento, segmentação, agendamento e rastreamento diretamente no WordPress.
Depois de analisar várias das opções mais populares, compilei esta lista dos 7 melhores plugins de publicidade para WordPress para ajudá-lo a escolher o certo para o seu blog.
Visão Geral: Melhores Plugins de Publicidade para WordPress para Blogueiros
Sem tempo para ler as avaliações completas? Sem problemas, confira esta tabela comparativa para encontrar rapidamente o melhor plugin de publicidade para suas necessidades:
| # | Plugin | Melhor Para | Preço Inicial | Versão Gratuita |
|---|---|---|---|---|
| 1 | Anúncios Avançados | Controle completo de gerenciamento de anúncios | €59/ano | ✅ |
| 2 | WPCode | Adicionar e controlar código de anúncio com segurança em todo o seu site | $49/ano | ✅ |
| 3 | AdRotate Banner Manager | Rotação e agendamento de anúncios gratuitos | €49/ano | ✅ |
| 4 | AdSanity | Gerenciando e rastreando seus próprios anúncios auto-hospedados | $9/mês | ❌ |
| 5 | Ad Inserter | Posicionando anúncios em locais muito específicos em todo o seu site | €20/ano | ✅ |
| 6 | Quads Ad Manager | Executando AdSense com posicionamento adequado e suporte AMP | US$ 89/ano | ✅ |
| 7 | Google Ad Manager | Gerenciando anúncios em várias redes e acordos diretos | Grátis | ✅ |
Por que você precisa de um Plugin de Publicidade para WordPress
Adicionar código de anúncio manualmente ao seu site pode funcionar no início, mas rapidamente se torna difícil de gerenciar. Os anúncios podem acabar aparecendo nos lugares errados, os layouts podem quebrar quando seu tema é atualizado e testar diferentes posicionamentos geralmente significa alterar o código repetidamente.
Um plugin de publicidade para WordPress resolve isso, dando a você controle dentro do seu painel. Em vez de depender de arquivos de tema ou do comportamento padrão da rede de anúncios, você decide como e onde os anúncios aparecem em seu site.
Com esse nível de controle, você pode fazer coisas como:
- Colocar anúncios em locais específicos como após parágrafos, em barras laterais ou entre posts
- Excluir anúncios de certas páginas como contato, sobre ou páginas de privacidade
- Alternar diferentes anúncios na mesma posição
- Agendar anúncios para iniciar ou parar automaticamente
- Ver quais posicionamentos de anúncios estão realmente performando
Tudo isso torna muito mais fácil otimizar seus anúncios ao longo do tempo, o que pode levar diretamente a um melhor desempenho e mais receita com o mesmo tráfego.
Como Testo e Avalio Plugins de Publicidade para WordPress
Eu testo plugins de anúncios há anos, principalmente porque fazer com que os anúncios apareçam exatamente onde você quer é mais difícil do que parece.
Existem muitas opções por aí, e muitas delas parecem semelhantes na superfície, até que você realmente tente fazer algo específico, como colocar um anúncio no meio de um post, mas não exibi-lo em todas as páginas. É aí que as coisas geralmente começam a desmoronar.
Quando testo um plugin de publicidade, penso no blogueiro médio: alguém que quer monetizar seu conteúdo, não quer mexer em código e precisa que tudo funcione de forma confiável, sem manutenção contínua.
Eu configuro cada plugin do zero e presto muita atenção em como ele se comporta em um blog WordPress real.
Veja o que eu analiso em cada avaliação:
- Facilidade de configuração: Quão rápido você consegue ter um anúncio funcionando sem editar arquivos de tema ou vasculhar a documentação
- Controle de posicionamento: Quanta flexibilidade você tem sobre onde os anúncios aparecem, incluindo posts, páginas e seções específicas
- Suporte a redes de anúncios: Se funciona bem com diferentes redes de anúncios
- Rastreamento: Se você realmente consegue ver o que está performando e o que não está
- Impacto no desempenho: Se o plugin permanece leve ou deixa o site lento
Essa abordagem deixa claro quais plugins realmente facilitam o gerenciamento de anúncios e quais acabam criando mais trabalho do que resolvem.
Dito isso, vamos dar uma olhada nos melhores plugins de publicidade para WordPress!
1. Advanced Ads: Melhor Plugin para Gerenciamento Completo de Anúncios
- Exiba um número ilimitado de anúncios e posicionamentos
- Crie anúncios individuais ou blocos de anúncios
- Defina datas de início e expiração para anúncios
- Testes A/B e relatórios de rastreamento de anúncios
- Proteção contra fraude de cliques
- Venda espaço publicitário diretamente no frontend do seu site
- Acione anúncios com base na atividade do usuário
- E mais…
Advanced Ads é um dos plugins de gerenciamento de anúncios mais completos para WordPress, e é minha principal escolha para blogueiros que realmente querem transformar tráfego em renda. Consegui fazer um anúncio funcionar quase imediatamente após instalá-lo, sem ter que passar por um longo processo de configuração primeiro.
Este plugin funciona com muitos tipos diferentes de anúncios, incluindo Google AdSense, Google Ad Manager, anúncios da Amazon e muito mais.
Onde o Advanced Ads realmente se destaca é na sua integração com o AdSense. Você pode importar unidades de anúncios diretamente da sua conta AdSense, ajustar tamanhos e configurações dentro do WordPress e gerenciar tudo sem alternar constantemente entre painéis.
Ele também gera automaticamente seu arquivo ads.txt com os detalhes corretos, o que é importante se você estiver levando o AdSense a sério.
O que eu mais gosto é a flexibilidade das regras de exibição. Você pode mostrar ou ocultar anúncios em posts específicos, categorias, páginas de arquivo ou na página inicial, e excluir facilmente páginas onde os anúncios não fazem sentido. Ele também suporta segmentação por dispositivo, então você pode mostrar anúncios diferentes para usuários de celular e desktop, se necessário.
O Advanced Ads suporta até injeções automáticas, que permitem colocar anúncios automaticamente em seu conteúdo com base em parágrafos, títulos e imagens. Isso significa que você não precisa abrir páginas ou posts existentes para que seus banners apareçam, economizando muito tempo.
O recurso de rotação de anúncios também é super útil. Você pode agrupar vários anúncios e deixar o plugin rotacioná-los automaticamente, o que facilita testar diferentes anúncios ou posicionamentos sem alterar as coisas manualmente constantemente.
Os relatórios integrados ajudarão você a identificar seus anúncios de melhor desempenho rastreando cliques e impressões. Além disso, inclui testes A/B para que você possa ver quais configurações têm melhor desempenho ao longo do tempo em vez de adivinhar.
| Prós do Advanced Ads: | ✅ Aprovado pelo Google, funciona com todas as principais redes de anúncios ✅ Integração AdSense mais profunda nesta lista ✅ Condições precisas de exibição e visitante sem codificação ✅ Rotação de anúncios e testes A/B incluídos ✅ ads.txt gerado automaticamente para conformidade com o AdSense ✅ Vem com rastreamento e relatórios detalhados |
| Contras do Advanced Ads: | ❌ Alguns usuários relatam bugs introduzidos por atualizações recentes ❌ A versão gratuita é limitada |
Por que recomendo o Advanced Ads: O Advanced Ads é ideal para blogueiros que desejam controle total sobre a configuração de seus anúncios e planejam gerenciá-lo e otimizá-lo ativamente ao longo do tempo. Ele oferece muita flexibilidade em como os anúncios são colocados, exibidos e testados, o que o torna uma ótima opção se você deseja mais do que apenas inserção básica de anúncios. Se você precisa apenas de algo simples para colocar alguns anúncios, existem ferramentas mais fáceis nesta lista.
Preços: Existe uma versão gratuita do plugin disponível para download. A versão Pro começa em € 59 por ano para um único site.
2. WPCode: Melhor para Adicionar e Controlar Código de Anúncios com Segurança

- Insira facilmente código de anúncio e exiba anúncios em qualquer lugar do WordPress
- Recurso de inserção automática para controlar onde seus anúncios são exibidos
- Agende anúncios para serem exibidos em períodos específicos
- Pixels de conversão para rastrear o desempenho dos anúncios
- Painel amigável para gerenciar seu código
- Integra-se com WooCommerce, Easy Digital Downloads e MemberPress
- E mais…
O WPCode é um gerenciador de trechos de código do WordPress com mais de 3 milhões de instalações ativas, e é minha escolha para blogueiros que desejam adicionar código de anúncios de qualquer rede sem instalar um plugin de publicidade dedicado.
Se o Google fornecer um script do AdSense e você precisar dele no cabeçalho, rodapé ou em qualquer lugar entre eles do seu site, o WPCode cuida disso em alguns cliques, diretamente do seu painel do WordPress.
Eu uso este plugin há anos e adicionar código de anúncios é super simples, mesmo para iniciantes. Você cria um novo trecho, cola o código (seja AdSense, Amazon Ads ou qualquer outra rede), escolhe onde ele deve ir e publica.
O código é executado no seu site exatamente como se você o tivesse adicionado aos arquivos do seu tema, exceto que ele é armazenado separadamente, então ele sobrevive a atualizações e alterações de tema sem que você precise pensar nisso novamente.
Eu amo a validação inteligente do WPCode. Antes que um trecho vá ao ar, o plugin verifica erros e o impede automaticamente de ser executado se algo estiver errado. Para blogueiros que não se sentem confortáveis com código, isso significa que eles podem tentar coisas com segurança sem se preocupar em quebrar o site.
Ele vem com locais avançados de inserção automática, que permitem exibir anúncios automaticamente no conteúdo do seu post, entre posts, no final dos posts, em cabeçalhos e rodapés de todo o site, antes ou depois do carrinho WooCommerce, e muito mais.
O WPCode também ajudará você a rastrear o desempenho de seus anúncios em plataformas populares como Facebook, Pinterest, TikTok e Google Ads. Em alguns cliques simples, você pode adicionar pixels de conversão de eCommerce para rastrear eventos como visualização de página de produto, adicionar ao carrinho, checkout e compra.
E a melhor parte é que o WPCode não é apenas para anúncios, na verdade, há uma TONELADA de usos incríveis para este plugin:
| Prós do WPCode: | ✅ Funciona com qualquer rede de anúncios — cole qualquer código e ele executa ✅ Verificação inteligente de erros para que você nunca quebre seu site acidentalmente ✅ Locais avançados de inserção automática e lógica condicional para controlar onde seus anúncios aparecem ✅ O código do anúncio sobrevive a atualizações e trocas de tema ✅ Mais de 140 snippets prontos para outras tarefas do WordPress ✅ A versão gratuita cobre tudo o que a maioria dos blogueiros precisa |
| Contras do WPCode: | ❌ Sem rotação de banners de anúncios ❌ O rastreamento de pixels de conversão requer um plano Pro |
Preços: Uma versão gratuita do WPCode vem com tudo o que você precisa para inserir código de anúncio no WordPress. Para recursos avançados como pixels de conversão de e-commerce, snippets de código agendados e mais, você precisa fazer o upgrade para o WPCode Pro, a partir de R$ 249 por ano.
Por que eu recomendo o WPCode: O WPCode é a escolha certa para blogueiros que já têm uma conta de rede de anúncios e só precisam que o código seja implantado corretamente, com controle sobre onde ele é executado, locais de inserção automática para posições específicas em seu conteúdo e verificação de erros para que nada quebre. O Pro adiciona rastreamento de pixels de conversão para plataformas como Google Ads, Pinterest e TikTok. Se você precisa girar vários banners ou testar posicionamentos A/B, o Advanced Ads é feito para isso.
3. AdRotate Banner Manager: Melhor Plugin Gratuito para Rotação de Anúncios
- Painel de gerenciamento de anúncios simples
- Crie anúncios individuais e grupos de anúncios
- Coloque anúncios em qualquer lugar do seu site WordPress
- Suporta rotação automática de anúncios
- Rastreia cliques e impressões
- E mais…
AdRotate Banner Manager é outro dos melhores plugins gratuitos de publicidade do WordPress disponíveis para você, pois permite criar anúncios ilimitados e exibi-los facilmente em qualquer página ou post do WordPress usando blocos, widgets e shortcodes.
Você pode colocar banners e anúncios em seu site de redes de afiliados como a Amazon e de várias redes de anúncios como Google AdSense, Google Ad Manager, BuySellAds, DoubleClick e muito mais. Você também pode criar seus próprios anúncios com HTML básico e o gerador de anúncios integrado.
Onde ele se destaca dos outros nesta lista é a rotação de anúncios — alternando vários anúncios no mesmo local automaticamente para que nenhum banner único seja exibido toda vez que um leitor carrega a página.
O sistema funciona através de grupos de anúncios. Você cria anúncios individuais, os atribui a um grupo, e o grupo representa um local em seu site. Quando um leitor visita, o AdRotate escolhe qual anúncio mostrar, alternando entre todo o seu conjunto ao longo do tempo.
Você pode adicionar quantos anúncios quiser a um grupo e criar quantos grupos seu layout exigir. Locais em um lado, conteúdo no outro. É uma maneira limpa de pensar sobre gerenciamento de anúncios.
Durante os testes, também descobri que ele suporta agendamento de anúncios e rastreia cliques e impressões para que você possa acompanhar o desempenho de seus anúncios.
| Prós do AdRotate Banner Manager: | ✅ Construído em torno da rotação de anúncios — faz isso melhor do que a maioria nesta lista ✅ Grupos de anúncios facilitam o gerenciamento de várias campanhas em um local ✅ Agendamento permite que campanhas comecem e parem sem intervenção manual ✅ Compatível com todas as principais redes de anúncios e HTML personalizado ✅ Funciona com o editor de blocos, widgets e shortcodes ✅ Rastreamento de cliques e impressões na versão gratuita |
| Contras do AdRotate Banner Manager: | ❌ Mantido por um único desenvolvedor, o que significa ciclos de atualização mais lentos e suporte apenas por fórum na versão gratuita ❌ Alguns usuários relatam que os banners de upsell no painel da versão gratuita são intrusivos |
Preços: Gratuito. Há também uma versão premium disponível com recursos avançados como geo-targeting, anúncios mobile, disfarce de bloqueador de anúncios e mais, a partir de €49 por ano.
Por que recomendo o AdRotate Banner Manager: O AdRotate é uma das melhores opções gratuitas para blogueiros que estão começando com o gerenciamento de anúncios. A versão gratuita cobre rotação, agendamento e rastreamento de cliques sem exigir um plano pago, o que o torna um ponto de partida prático se você deseja executar várias campanhas sem se comprometer com uma assinatura.
4. AdSanity: Melhor para Gerenciar Seus Próprios Anúncios Auto-Hospedados
- Interface amigável
- Funciona para anúncios auto-hospedados e anúncios de redes externas
- Insira facilmente anúncios em qualquer lugar do seu site WordPress
- Insira um único anúncio ou um grupo de anúncios
- Agende anúncios com datas de início e término
- Estatísticas gráficas para acompanhar o desempenho dos anúncios
- E mais…
AdSanity é um plugin leve de gerenciamento de anúncios para WordPress, criado para blogueiros que desejam veicular seus próprios anúncios (banners personalizados, gráficos de afiliados, promoções de negócios locais) sem afetar a velocidade do seu site.
A maioria dos plugins de gerenciamento de anúncios é projetada primeiro para o AdSense e trata todo o resto como um complemento. O AdSanity trata todos os tipos de anúncios igualmente, quer você esteja veiculando um anúncio de rede ou um banner que você mesmo criou.
Descobri que o processo de configuração parece familiar e fácil porque o AdSanity utiliza a própria interface do WordPress. Você cria um anúncio da mesma forma que criaria uma postagem: há um título, uma área de conteúdo para o seu código de anúncio ou imagem, e opções de agendamento na barra lateral. Se você sabe como escrever uma postagem no WordPress, você já sabe como o AdSanity funciona.
Cada anúncio no AdSanity é executado em sua própria programação. Você define uma data exata de publicação e término, ou o executa indefinidamente. Uma promoção sazonal de afiliados, um banner de parceiro com prazo final e um banner para seu próprio conteúdo que é executado o ano todo podem rodar lado a lado, cada um em sua própria programação. Nada passa despercebido porque você esqueceu de desativá-lo.
As estatísticas de cliques e impressões são simples, mas cobrem o que importa. Você pode ver como cada anúncio se sai individualmente, que é exatamente o que você precisa ao relatar a um anunciante de negócio local ou comparar dois banners no mesmo local para ver qual deles recebe cliques.
| Prós do AdSanity: | ✅ Criado para anúncios auto-hospedados e anúncios de rede ✅ Interface familiar estilo postagem do WordPress é fácil de aprender ✅ Agendamento baseado em data para gerenciamento preciso de campanhas ✅ Construção leve que não vai deixar seu blog lento ✅ Suporte forte — tempo médio de resposta de 3,5 horas ✅ Suporta anúncios em vídeo além de banners padrão e formatos HTML5 |
| Contras do AdSanity: | ❌ Sem versão gratuita ❌ Aparência condicional de anúncios requer a compra de um addon separado — plugins como Advanced Ads e WPCode incluem este recurso sem a necessidade de pagar extra |
Preços: A partir de US$ 9 por mês (cobrado anualmente) para o plugin principal AdSanity e acesso a todos os addons básicos.
Por que recomendo o AdSanity: O AdSanity se destaca para blogueiros que criam e vendem seus próprios anúncios. Se você está trabalhando com empresas locais, patrocinadores ou veiculando banners de afiliados que você mesmo montou, ele oferece uma maneira limpa de gerenciar tudo isso com estatísticas por anúncio que você pode compartilhar diretamente com os anunciantes. Se você está veiculando principalmente código de uma rede de anúncios, os outros plugins desta lista são mais adequados e acessíveis.
5. Ad Inserter: Melhor para Posicionamento e Otimização Avançada de Anúncios
- Insere anúncios automaticamente em posts e páginas
- Opção de desativar a inserção automática de anúncios em posts e páginas específicas
- Insira códigos de anúncios diferentes em páginas AMP
- Suporta rotação de anúncios programada
- Alinhamentos e estilos personalizados
- Detecção de bloqueio de anúncios
- E mais…
Ad Inserter é um dos plugins de gerenciamento de anúncios gratuitos mais populares disponíveis para WordPress, com mais de 300.000 instalações ativas. Este plugin de anúncios facilita a colocação de anúncios de rede nas posições mais ideais do seu site WordPress, posições que outros plugins não conseguem alcançar.
Por exemplo, você pode inserir um anúncio antes ou depois de um número específico de parágrafos, entre posts no feed principal do seu blog, perto de imagens, dentro de threads de comentários ou em posições personalizadas integradas ao seu tema. Se você já tentou colocar um anúncio em um local específico e não conseguiu fazer com que outro plugin o fizesse, o Ad Inserter geralmente consegue.
Ele suporta vários tipos de anúncios, incluindo anúncios em banner rotativos, Google AdSense, DoubleClick, Amazon Native Shopping Ads, Media.net e Infolinks. A integração com o AdSense inclui um gerador de código integrado que cria o código correto para o posicionamento escolhido.
A pré-visualização visual do código é algo que não vi em outros plugins de anúncios gratuitos. Você pode ver exatamente onde seus blocos de anúncios aparecerão em uma página ativa e usar o seletor de elementos visuais para segmentar elementos específicos da página sem escrever CSS manualmente.
A única coisa para a qual você precisa estar preparado com o Ad Inserter é o painel de configurações. Cada bloco de anúncio tem seu próprio conjunto completo de controles, e na primeira vez que você o abre, há muita coisa na tela. Fiquei confortável com o layout depois de cerca de uma hora, mas não é o plugin que você procura se quiser estar pronto para usar em cinco minutos.
| Prós do Ad Inserter: | ✅ Mais posições de inserção do que a maioria dos outros plugins desta lista ✅ Funciona com AdSense, Google Ad Manager e qualquer outra rede ✅ Veja exatamente onde seu anúncio aparecerá em uma página ativa antes de ir ao ar ✅ Detecta quando os leitores estão usando bloqueadores de anúncios e permite que você mostre uma mensagem ou conteúdo alternativo em vez disso ✅ A versão gratuita cobre tudo o que a maioria dos blogueiros precisará |
| Contras do Ad Inserter: | ❌ O painel de configurações pode parecer esmagador quando você o abre pela primeira vez ❌ Estatísticas de cliques e testes A/B exigem uma licença Pro |
Preço: Gratuito. Há também uma versão premium disponível com recursos avançados de gerenciamento de anúncios como geolocalização, testes A/B, relatórios de estatísticas e mais, a partir de €20 por ano.
Por que recomendo o Ad Inserter: Se há um local específico em seu blog onde você nunca conseguiu colocar um anúncio, o Ad Inserter é o plugin que provavelmente pode fazer isso. Para um gerenciamento direto do AdSense sem configurações complicadas, o Advanced Ads ou o WPCode são pontos de partida mais simples.
6. Quads Ad Manager para Google AdSense: Melhor para Posicionamento de AdSense e Suporte AMP
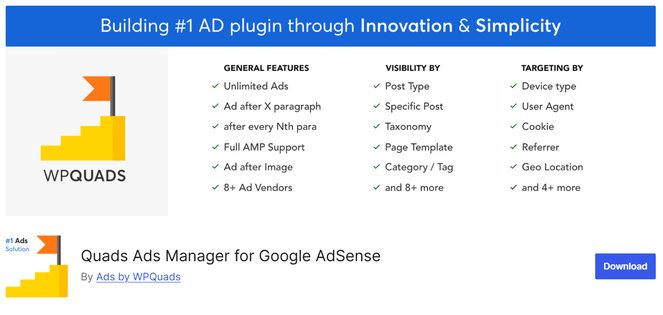
- Integração profunda com o Google AdSense
- 12 posições de anúncio para escolher
- Suporte AMP integrado
- Múltiplas condições de segmentação disponíveis
- Proteção contra cliques inválidos para ajudar a estabilizar a receita de anúncios
- Venda espaço publicitário diretamente do seu blog
- E mais…
Quads Ad Manager é outro plugin de anúncios do WordPress com uma classificação de 4.9/5 e mais de 20.000 instalações ativas. Ele foi desenvolvido para blogueiros que usam o Google AdSense e desejam uma interface moderna e rápida, além de anúncios que funcionam corretamente tanto em páginas padrão quanto em páginas AMP, sem nenhuma configuração adicional.
A configuração do AdSense abrange todos os principais tipos de anúncios do Google: anúncios de display, anúncios in-feed, anúncios in-article e Auto Ads. Você gerencia tamanhos, posicionamentos e responsividade em uma única tela, o que torna o painel de opções mais rápido de navegar do que a maioria dos painéis de plugins.
As 12 posições de posicionamento incluem alguns detalhes úteis, como inserir um anúncio após cada terceiro parágrafo ou após uma imagem específica, em vez de apenas uma opção genérica de "após o conteúdo".
O suporte AMP é o recurso de destaque que descobri durante os testes. Fazer com que os anúncios apareçam em páginas AMP geralmente requer configuração separada. O Quads Ad Manager cuida disso automaticamente, para que seus anúncios do AdSense apareçam corretamente nessas páginas sem nada extra da sua parte.
Além do AdSense, o plugin suporta mais de 8 redes de anúncios e inclui um recurso mais recente que permite vender espaço publicitário diretamente do seu blog, com preços definidos por você e anunciantes comprando posicionamentos através do próprio plugin.
Vale a pena saber que alguns usuários relataram que o plugin cria páginas automaticamente e as insere no menu de navegação do site. Os desenvolvedores abordaram isso em atualizações, mas verifique seu menu após a ativação para garantir que nada inesperado apareça.
| Prós do Quads Ad Manager: | ✅ Plugin gratuito cobre configuração do AdSense, controle de posicionamento e suporte AMP ✅ 12 posições de posicionamento, incluindo segmentação em nível de parágrafo e imagem ✅ Suporta mais de 8 redes de anúncios além do AdSense ✅ Painel de opções fácil de usar para iniciantes ✅ Venda espaço publicitário diretamente do seu blog |
| Contras do Quads Ad Manager: | ❌ Alguns usuários relataram pequenos erros no plugin ❌ Relatórios de rastreamento e segmentação geográfica exigem a versão Pro |
Preço: Gratuito. Você também pode fazer upgrade para o Quads Ad Manager Pro a partir de US$ 89 por ano para 1 site.
Por que recomendo o Quads Ad Manager: O Quads Ad Manager é uma opção gratuita e robusta para blogueiros que usam o Google AdSense e desejam que seus anúncios funcionem corretamente tanto em desktops quanto em dispositivos móveis, incluindo páginas AMP. Se você monetiza com o AdSense e tem um tráfego móvel sólido, o suporte integrado para AMP por si só já vale a pena a instalação.
7. Google Ad Manager: O melhor para gerenciar múltiplas redes de anúncios e acordos diretos de anúncios

- Suporte para formatos de anúncios em vídeo, nativos e personalizados
- Painel poderoso de gerenciamento de anúncios
- Mais de 30 controles para escolher os tipos de anúncios que você deseja exibir em seu site
- Capacidade de permitir ou bloquear a exibição de anúncios
- Rastreamento e relatórios avançados
- E mais…
O Google Ad Manager é uma plataforma de anúncios gratuita do Google para publicadores que desejam mais controle sobre como os anúncios são exibidos em seus sites e a capacidade de ganhar mais dinheiro do que com o AdSense básico.
Configurá-lo é mais complexo do que instalar um plugin. Você precisará criar uma conta, configurar seus espaços de anúncios dentro da plataforma e adicionar o código do Google ao seu site WordPress. É factível, mas leva mais tempo e esforço do que ferramentas mais simples.
O principal benefício é que você não depende de apenas uma fonte de anúncios. Você pode trazer múltiplos parceiros de anúncios, e o Ad Manager escolhe automaticamente o que paga mais por cada espaço de anúncio.
Ele também suporta diferentes tipos de anúncios, como display, nativos e vídeo, o que pode ajudar a aumentar a receita se eles se encaixarem no seu conteúdo.
Se você vende anúncios diretamente, o Ad Manager também ajuda a gerenciar isso. Você pode veicular campanhas para anunciantes enquanto ainda preenche o restante do seu espaço com anúncios de rede, e ele gerencia a prioridade com base nas regras que você define.
Observação: Quero ser honesto sobre para quem o Ad Manager realmente é. Ele é feito para sites grandes com muito tráfego e visualizações de anúncios constantes, para que múltiplas redes de anúncios possam competir. Se o seu blog ainda é pequeno, é mais do que você precisa.
| Prós do Google Ad Manager: | ✅ Múltiplas redes competem por cada impressão, o que pode aumentar a receita de anúncios ✅ Suporta formatos de anúncios nativos, de vídeo, out-stream e recompensados ✅ Gerencia acordos diretos de anúncios e preenchimento de rede a partir de um único painel ✅ Relatórios detalhados por rede, anunciante, posicionamento e campanha ✅ Gratuito para contas de publicador padrão |
| Contras do Google Ad Manager: | ❌ Mais complexo do que qualquer plugin nesta lista ❌ Feito para publicadores grandes — blogs pequenos não verão o benefício |
Preços: Gratuito. Existe também uma versão premium, o Google Ad Manager 360 (GAM 360).
Por que recomendo o Google Ad Manager: O Google Ad Manager é ideal para blogs grandes com tráfego suficiente para atrair múltiplas redes de anúncios. Nesse nível, ele pode aumentar os ganhos exibindo automaticamente o anúncio de maior valor para cada impressão. Se você ainda não está nesse estágio, é melhor começar com um plugin mais simples — você sempre pode mudar para o Ad Manager mais tarde, quando seu tráfego crescer.
Perguntas Frequentes Sobre Plugins de Publicidade WordPress
Se você é novo em publicidade no WordPress e ainda tem dúvidas, aqui estão as respostas que você pode estar esperando!
Preciso de um plugin para adicionar anúncios ao meu site WordPress?
Não, mas é muito mais fácil com um. Você pode colar o código de anúncio manualmente nos arquivos do seu tema, mas corre o risco de quebrar seu site e esse código desaparece toda vez que você atualiza seu tema. Um plugin armazena o código separadamente para que ele permaneça no lugar durante as atualizações e lhe dá controle sobre onde e quando os anúncios aparecem.
Qual é a diferença entre Google AdSense e Google Ad Manager?
O AdSense é o programa de publicidade do Google para publicadores. Você adiciona o código, o Google preenche seus espaços de anúncio automaticamente com anúncios relevantes e você é pago com base em impressões e cliques.
O Google Ad Manager é uma plataforma mais avançada que permite gerenciar seu próprio inventário de anúncios, incluindo acordos diretos com anunciantes específicos. A maioria dos blogueiros começa com o AdSense. O Ad Manager se torna útil quando você deseja vender espaço publicitário diretamente, em vez de depender do sistema automatizado do Google para preenchê-lo.
Qual plugin de publicidade é melhor para iniciantes?
Advanced Ads é o ponto de partida mais fácil se você deseja gerenciamento completo de anúncios. Ele o orienta na configuração e deixa seu primeiro anúncio funcionando em menos de um minuto. Se você só precisa colocar o código do AdSense no seu blog sem nenhuma curva de aprendizado, o WPCode é ainda mais simples: cole o código, escolha onde ele vai e pronto.
Existem plugins de publicidade gratuitos para WordPress?
Sim. Advanced Ads, WPCode, Ad Inserter, AdRotate Banner Manager e Quads Ad Manager têm versões gratuitas disponíveis no WordPress.org. AdSanity é o único plugin desta lista que requer uma assinatura paga desde o início.
Posso usar vários plugins de publicidade ao mesmo tempo?
Tecnicamente, você pode, mas geralmente não é uma boa ideia. Executar dois plugins de gerenciamento de anúncios ao mesmo tempo pode causar conflitos, deixar seu site lento e dificultar o rastreamento de quais posicionamentos estão realmente performando. Escolha um que atenda a tudo o que você precisa e mantenha-o. A maioria dos plugins desta lista é abrangente o suficiente para que você não precise de um segundo ao lado deles.
Qual é o melhor plugin de publicidade para WordPress?
Para a maioria dos blogueiros, Advanced Ads é o lugar certo para começar. Ele tem o melhor equilíbrio entre facilidade de configuração e controle real sobre onde seus anúncios vão e quanto eles rendem. A versão gratuita cobre tudo o que um blogueiro precisa para começar, e os recursos Pro estão lá quando sua receita de anúncios crescer o suficiente para justificá-los.
Se você já tem uma conta de rede de anúncios e só precisa do código no seu site sem o risco de quebrar nada, o WPCode é a opção mais simples. Você cola o código, define suas condições e pronto. Além disso, a versão gratuita inclui tudo o que você precisa para começar.
Se você construiu um público específico o suficiente para que as marcas paguem para alcançar seus leitores diretamente, o Google Ad Manager é a plataforma que torna esse modelo de receita possível. É mais configuração do que um plugin, mas abre um nível de publicidade que as redes automatizadas sozinhas não conseguem replicar.
Isso é tudo! Se você gostou deste artigo, talvez queira ler nosso guia sobre como aumentar seus ganhos com o Google AdSense. Ele é repleto de dicas fáceis para aumentar sua taxa de cliques. Você também pode querer ver minhas principais escolhas dos melhores plugins de afiliados para WordPress.
Enquanto você está aqui, não se esqueça de assinar nossa newsletter por e-mail para mais dicas úteis de blog!

Um ótimo artigo, obrigado por compartilhar este blog.