
A re you wondering how to add a PayPal donate button to your blog? Look no further, we’ve got you covered.
There are many reasons for adding a donate button to your blog. You might be looking for early financial support for a blog that you just started so that you can keep up with the running costs.
Or, perhaps you run a nonprofit organization or maybe you’re looking for online donations for your church?
Whatever the case, in this guide, we’ll show you how to add a PayPal donate button to your blog in a few easy steps.
In This Guide:
Key Takeaways To Add and Use The PayPal Donate Button On Your Blog
- A PayPal donate button helps collect funds for blog operational costs, charity, or nonprofit’s fundraising.
- There are 3 popular ways to add donation buttons like WPForms, directly through PayPal’s site, or by using another plugin.
- Donors can use PayPal or credit cards, making contributions easy and accessible.
- The WPForms plugin simplifies creating and integrating donation forms on your WordPress sites.
- This method captures donor information to help you build your email lists and enhance visitor relationships.
- If you’re feeling adventurous, you can also use PayPal’s site to manually create your button.
- There’s also a free PayPal Donations plugin to integrate donation buttons; however, just note that recent reviews of the plugin are not great, with many complaining of errors.
What is a PayPal Donation Button & Why Do Nonprofits and Bloggers Need It For Fundraising?
A PayPal donate button lets you collect donations online through your blog. You can create a button from PayPal’s website or you can use a WordPress plugin to create one real quick.
With the help of a WordPress plugin like WPForms, you can easily add the donate button to your website anywhere you want.
You can add it to your footer, sidebars, or on selected blog posts.
As for why you need to use the PayPal donate button, you’ll find it useful if you are looking to collect donations for your website’s running costs or for your organization’s nonprofit.
Once the visitor clicks on the donate button, they will be able to make a payment through the PayPal system. They will be redirected to a PayPal page where they can choose to pay via PayPal or credit card.
Though the PayPal donate button’s implementation is completely free, you must still consider the 2.9% + $0.03 transaction and processing fee – though PayPal offers discounted transaction rates for nonprofits.
And don’t worry, people who are making the donation won’t have to pay an extra dime.
Now that we’ve got that out of the way let’s talk about the implementation.
How to Add a Smart PayPal Donation Form with a Plugin [WPForms]
WPForms lets you create awesome WordPress forms that allow you to accept different payment methods using credit cards, debit cards, Stripe, or PayPal (be sure to check out our thoughts on the best Stripe payment plugins for WordPress).

- Easy drag and drop form builder
- Customizable form fields
- Ready-made form templates
- Integrates with popular email marketing services
- Prevents spam through its anti-spam feature
- Looks great on the frontend
The best part about WPForms is that you can collect donor information with their consent and add them to your email list. And we don’t need to tell you the importance of growing your email list.
We’ve already talked about it in great detail in our email marketing guide.
Before we start, you should know that you will need to get a WPForms Pro version or higher to take donations.
And if you want, here’s a quick video walkthrough you can follow along with the steps below.
First, you need to install and activate WPForms on your blog. Once you’ve started WPForms, go to WPForms » Addons.
Look for the PayPal Standard Addon on the left and click on Install Addon.

Now we’ll proceed to create the donation form. Go to WPForms » Add New in your WordPress admin area to start building your form.
Enter the name and then select Donation Form.

WPForms will now load a pre-built template you can use. If you want to make any changes to the template, you can drag and move the fields around as you like.
You can also add new fields from the left-hand panel simply by dragging and dropping.
Take a look at the example below. We added a Multiple Choice field and edited the entries using the Field Options.

Once you’ve made the changes click on the Save button on the top right to proceed further.
Now you need to add the payments for your donation form. Go to Payments » PayPal Standard.
Click on Enable PayPal Standard Payments and enter your email address. Under the Payment processor Type dropdown, select donation. Once you’ve done that, click on the Save button to save your changes.

You’ve now successfully created a donation form with WPForms for your blog. But it’s not over yet. You still need to know how to add the donation form to your blog posts.
To add the donation form to your blog post, simply edit, customize, or create a post and then add a WPForms block to your WordPress content editor.

Select the donation form you’ve just created from the dropdown and save the changes to display your blog’s donation form.
Here’s what it looks like on our demo site:

Congratulations, you’ve now added a PayPal donation form to your blog!
And just so you know – this will help you collect donations and generate leads at the same time!
(After all – donation collectors may be legally obliged to obtain information about their donors.)
How to Add a PayPal Donor Button in WordPress Manually
PayPal offers the ability to accept donations, etc. using a code from your own account on their site.
Adding the PayPal donate button manually through PayPal’s website can be a little tricky, which is why we recommend using a WordPress plugin instead.
But maybe you like the old-school, more technical way, and that’s okay! (Just make sure to weigh the pros and cons of each option.)
But either way – I’ve got you covered below.
How to Add a PayPal Donate Button via PayPal Website (Manual Method)
The manual method is ideal for bloggers who aren’t afraid to get their hands dirty with coding. But, as I mentioned above, this method can be a bit tricky.
In this section, I’ll walk you through adding the PayPal donate button through PayPal’s site.
First, you need to go to the PayPal Fundraising page.

Next, scroll down the page and click Online Fundraising.

Once you click on the link, a new page will appear where you can finally click Learn more and sign in to create a button.

This will take you to the create a PayPal button page. Once there, select Donations from the dropdown as shown in the screenshot below.

As soon as you select the Donations option from the dropdown, you will be redirected to another page where you can create your own button.
Select the country, language, and button style. PayPal also gives you the option to upload your own button.
Once you’ve made the adjustments, click on Continue.

Now you need to add your email address connected with your PayPal and also add the purpose of your payment.

The next step is to choose your currency and set the donation amount. You can let the donors donate any amount they want, or you can place an exact amount depending on your needs.
Once you’ve done that, click on Finish and Get Code.

By clicking on the button mentioned above, you will be given a code to add to your WordPress blog. Then head to the WordPress dashboard and try copying and pasting in your code to embed it on your site.

Now that you have the code, you can show your donate button on any post, page, or widget on your WordPress blog.
For example, to create a new donation page, log in to your WordPress admin panel. Then, go to Pages and click on Add New.

If you are using the block editor, you will have to select the HTML block and then paste the donation button code.
Click on the Plus Icon and type in HTML in the search bar, as shown in the screenshot below.

Paste the HTML code in the HTML block and click on Preview to see the changes.

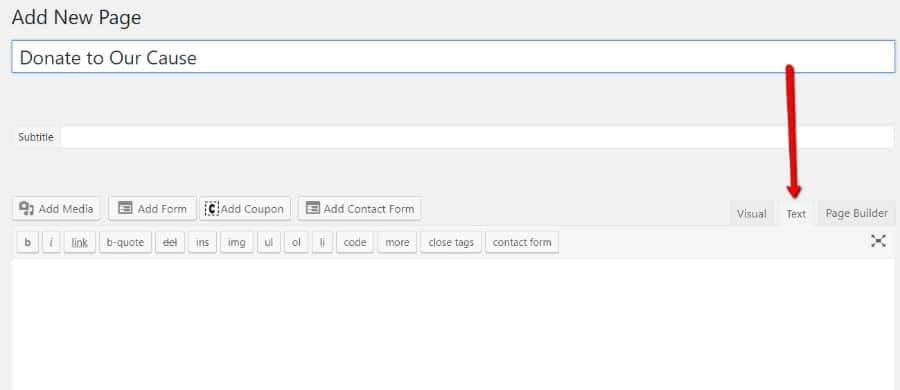
If you are using the classic editor, then you will have to paste the code in Text mode. As shown below:
And just note that you may want to add your logo, additional credit card logos, and anything else you want to include on the page.
And that’s it. You now know how to add the PayPal button manually on your WordPress blog.
Now let’s talk about our favorite method of adding the PayPal button through a WordPress plugin. It’s hassle-free and saves a lot of time. You’re going to love it!
How to Create Your Button For a Donation Page With a Free WordPress Plugin
This section will show you how to add a PayPal donate button to your blog using a WordPress plugin called PayPal Donations.
(Editorial Note: Just a slight word of warning that recent reviews haven’t great on this option so tread with caution. So I was actually hesitant to include it in this guide but I do want you have the most comprehensive guide possible so here we are.)
First, you need to install and activate the plugin. You can check out our guide on how to install a WordPress plugin for more details.
Once you’ve activated the plugin, go to Settings » PayPal Donations. Enter the email address that you’ve used to create your PayPal account.

Under the Optional Settings section, you can also create a thank you page using a plugin like SeedProd and add the URL in the Return Page box.

Under the Defaults section, you can add the amount, purpose, and reference of the donation. Once you’ve done that, you can select the PayPal button style or enter a URL to your own custom donation button image.

Once you’ve made the changes, click on the Save Changes button.

You’ve now successfully created your PayPal donation button. Now it’s time to add it to your blog pages.
The plugin makes it very easy to add the button wherever you want on your blog using a shortcode.
All you have to do is edit any existing page or post and then add the shortcode in the WordPress editor.

In the shortcode editor block, add the following shortcode [paypal-donation] and save the changes you made.
Here’s an example of what it looks like:

You can also easily add the donate button in the widget section or your blog’s footer area. Adding the donate button in the widget section or the footer area will give it more visibility and improve the chances of getting a donation.
Go to Appearance » Widgets and then drag the PayPal Donations widget to your right.

Wasn’t that easy? Now you know how to add a PayPal button through a WordPress plugin to your blog.
But we aren’t done yet, we made a promise of sharing one bonus tip with you before we end this blog, and we intend to keep that promise.
Closing Out On Adding a PayPal Donation Button To Your WordPress Blog
We hope that this article helped you learn how to add a PayPal Donate button to your blog.
We highly recommend using the PayPal Donations plugin when it comes to adding a PayPal donation button to your blog. It is by far the easiest way to add donation buttons, and the best part is that it’s completely free.
And if you want to take it up a notch, you can also use WPForms to gather more information about your donors. You can use this information to build a stronger relationship with your visitors/donors.
For example, you could send them a thank you note or a coupon in the future to build a stronger relationship.
If you liked this guide, then also check our guide on how to monetize your blog.
Also, don’t forget to subscribe to our newsletter for more blogging tips.

Nice Guide! the instructions are easy to follow, thank you for adding arrows on the picture, it helps us save time from looking on what the steps on the text are pointing out. I really appreciate it.
Regards,
Chris