
L ooking to add a contact form to your WordPress site? Having a contact form gives your audience a direct way to get in touch with you.
Maybe they have a general question, or perhaps they want to make inquiries about your products or services. Either way, a contact form lets them do that.
In this article, we’ll show you how to create a simple contact form in WordPress. And don’t worry, there’s no coding involved as we’ll be using the WPForms plugin.
In This Guide:
Let’s begin!
Why Use a Contact Form?
Good question. Why not let people email you directly? Here are 3 good reasons to use a contact form.
1. Protects you from spam
Using a contact form stops you from getting loads of spam. If you disclose your email address on your website, then it’s likely to be picked up and copied by the spambots that regularly trawl websites. So keep your email address safe and use a contact form instead.
2. Saves you time
Using a contact form lets you control and organize the information that you need to collect. Which, in turn, cuts down on sending emails back and forth. And from a user perspective, they have a ready-to-use place to enter their message and hit send immediately.
3. Organizes information
With a contact form, you’ll receive consistent and organized information from your users. You can create specific fields to guide them through the messaging process, so you only receive what’s relevant.
How to Create a Simple Contact Form in WordPress (Step-by-Step)
When you start a new blog, you’ll notice that WordPress doesn’t come with a contact form, which means you’ll need to use a contact from plugin.
In this tutorial, you’ll learn how to create a simple contact form using WPForms:

WPForms is the most beginner-friendly contact form plugin available for WordPress. You can use the drag-and-drop builder to create a contact form in just a few clicks.
For this tutorial, we’ll use WPForms Lite, which is 100% free. You can upgrade to WPForms Pro at any time when you want to create more advanced forms, like a blog survey.
Let’s get started!
Step 1: Install WPForms
First up, you’ll need to install the WPForms plugin.
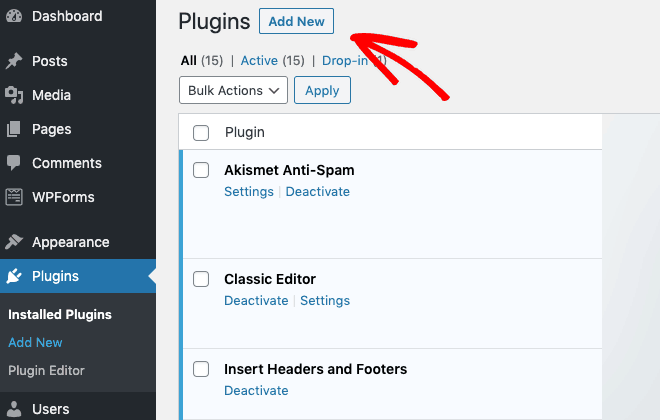
From your WordPress dashboard go to Plugins > Add New:
In the search field, enter WPForms:
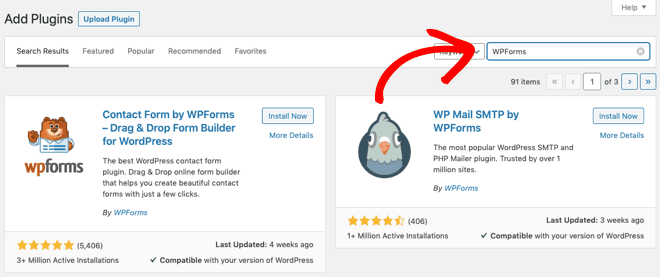
When you find it, click on the Install Now button. Once installed, make sure you activate the plugin.
Note: If you need help, follow our step-by-step guide on how to install a plugin in WordPress.
Step 2: Create a Simple Contact Form
Once you’ve activated the plugin, you’re ready to create your contact form.
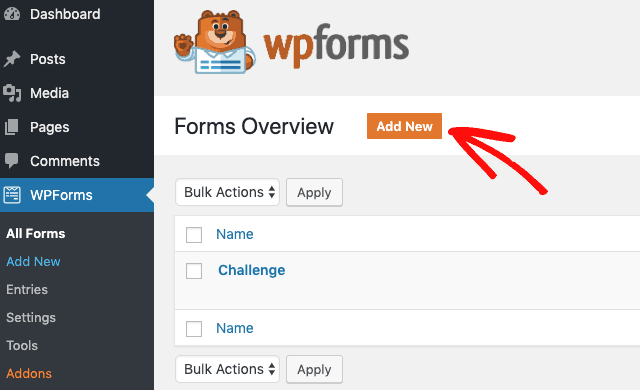
Click the Add New button in the WPForms menu to launch the drag-and-drop form builder:
Enter a name for your form:

And then select the Simple Contact Form template:

Now, you’ll see your contact form displayed with some sample fields:
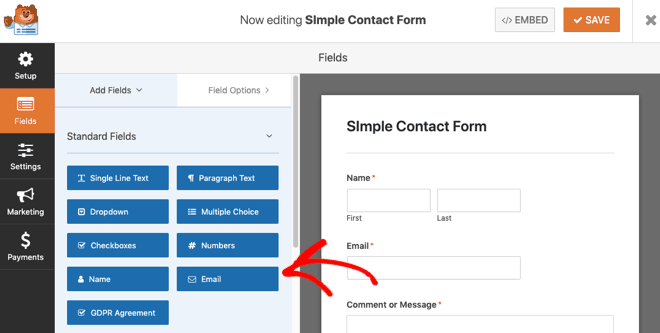
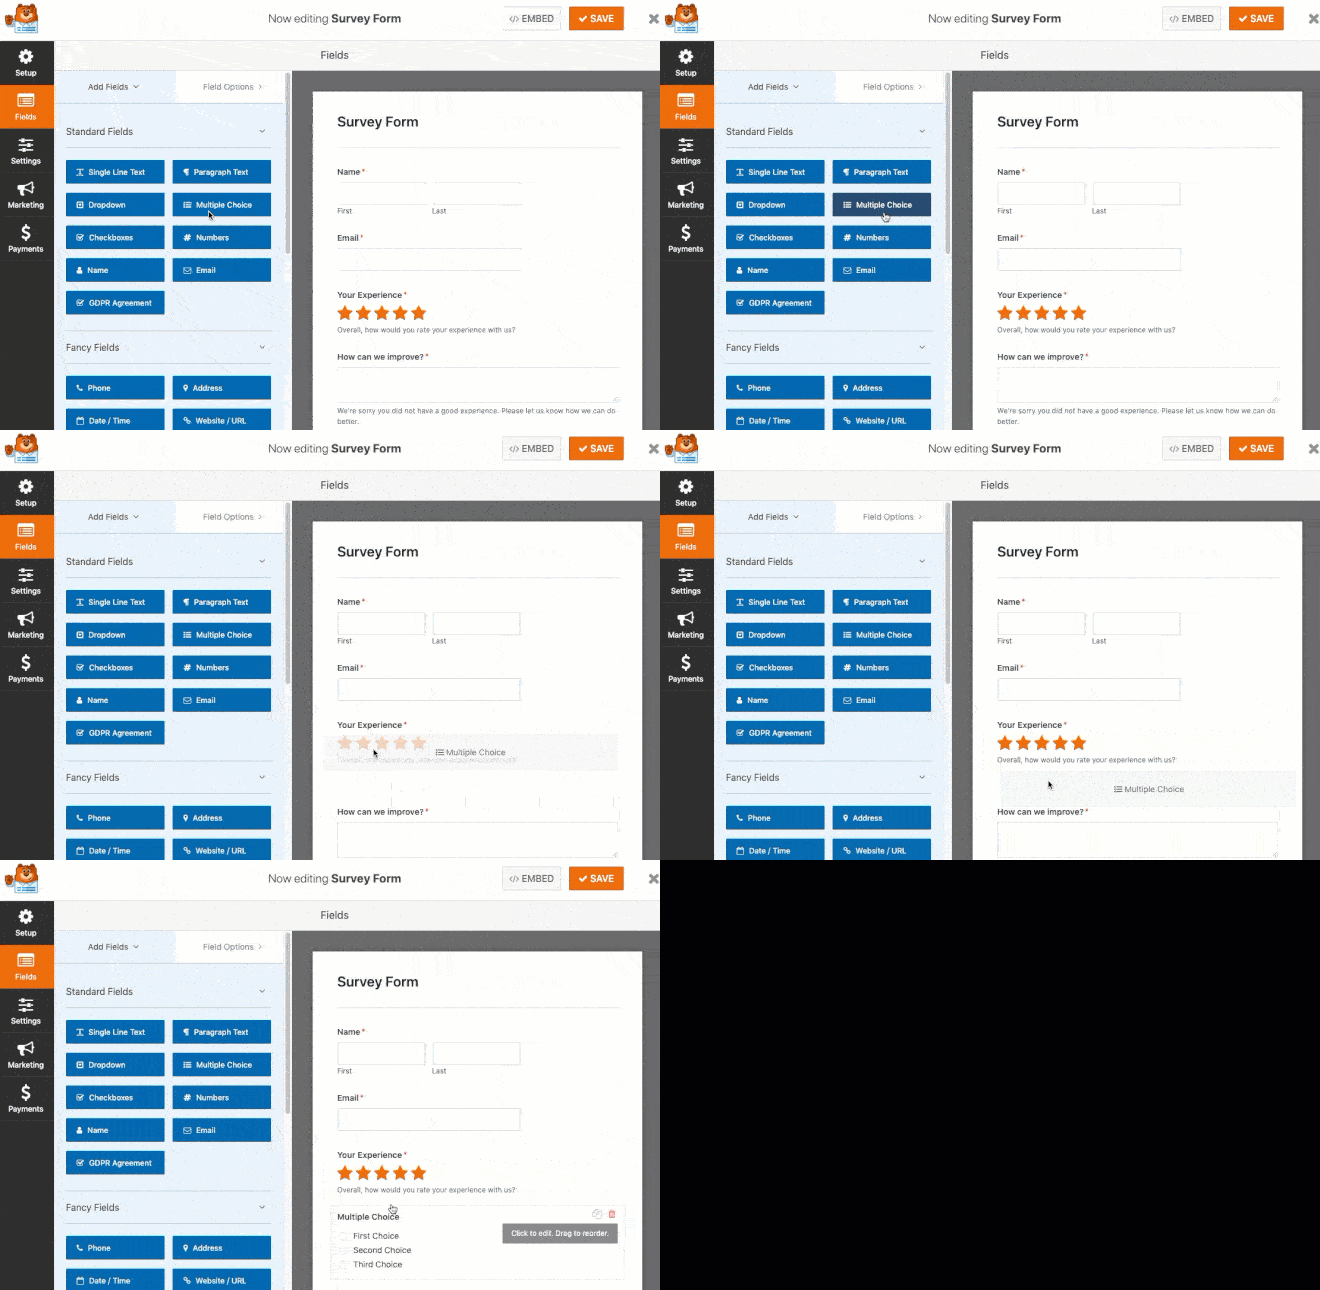
You’ll start with the Name, Email, and Message fields. But you can add additional fields to your contact form by dragging them from the left-hand panel to the right-hand panel:
And you can also rearrange the order of the fields on your form by dragging them into a new position:
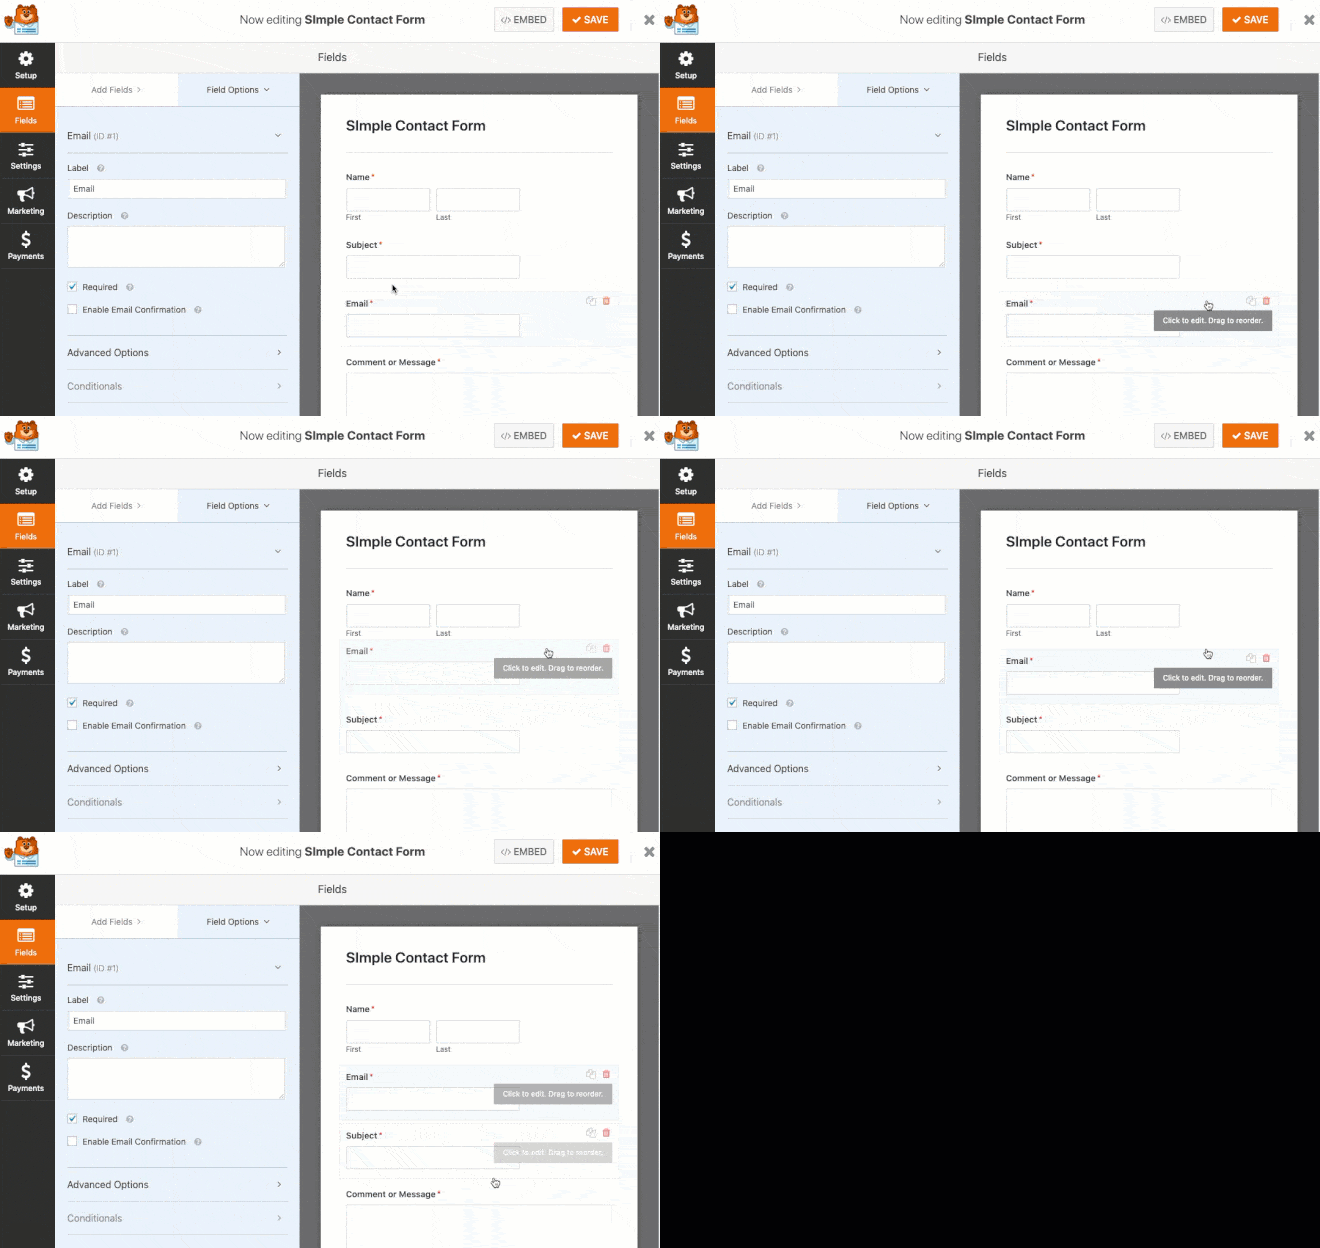
If you click on a form field, you’ll see the options to edit, reorder, or delete it:

Once you’ve finished customizing your form, click the Save button.
Step 3: Configure Your Contact Form General Settings
Next, you’re going to configure your contact form settings, so go to Settings > General:
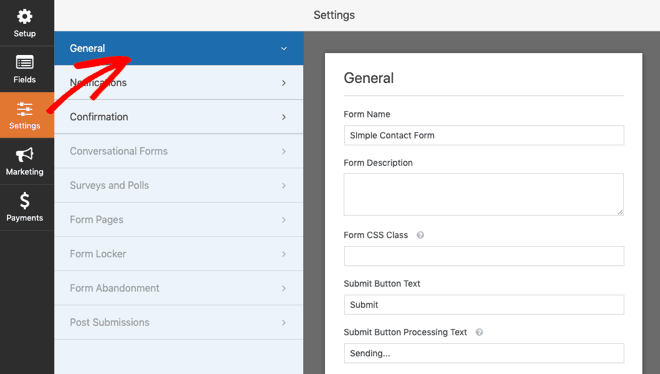
On this panel, you can configure the following:
- Form Name – Rename your form if you want to.
- Form Description – Give your form name a description.
- Submit Button Text – Change the text on the submit button.
- Enable the anti-spam honeypot – Prevent spambots from submitting forms. (This feature is automatically enabled on all WordPress forms. If you decide to use another form of spam prevention, then uncheck this option.)
- Enable Google Invisible v2 reCAPTCHA – Adds the reCAPTCHA to prevent spambots.
There are also options to add various custom CSS class names, but these are not required when creating a simple contact form.
Note: The WPForms Lite plugin is GDPR compliant, as no user cookies or details are collected. If you’re using the WPForms Pro plugin, then you’ll get additional settings to Disable User Cookies and Disable User Details if you wish. You can find more details on how to create GDPR compliant forms here.
When you’ve configured the general settings, click Save.
Step 4: Configure Your Contact Form Notifications
The Notifications settings let you know via email whenever someone submits a contact form on your website:
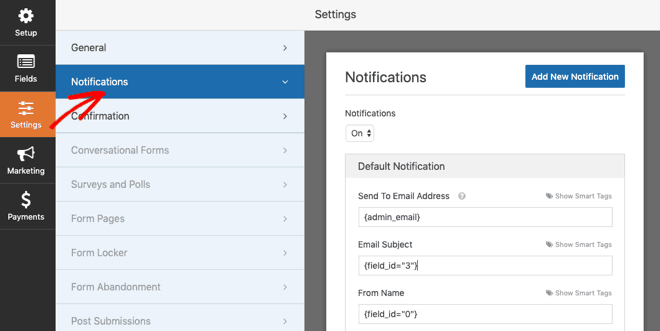
All fields are pre-populated when you create the form, and unless you need to change them, they’ll work fine.
- Send To Email Address – Default notifications go to the Admin Email address that’s set up on your site. (You can change the default or add multiple email addresses if you wish.)
- Email Subject – Pre-filled with your form name.
- From Name – Pre-filled with your user’s name.
- From Email – Pre-filled with your user’s email address.
- Reply To – Pre-filled with your user’s email address.
- Message – Contains the user’s message from the form.
If you use smart tags, you can also send a notification to the user when they submit a contact form to let them know you received it and will be in touch shortly.
When you’ve completed the notification settings, click Save.
Step 5: Configure Your Contact Form Confirmations
The Confirmation setting lets you display a message to users when they complete your form:
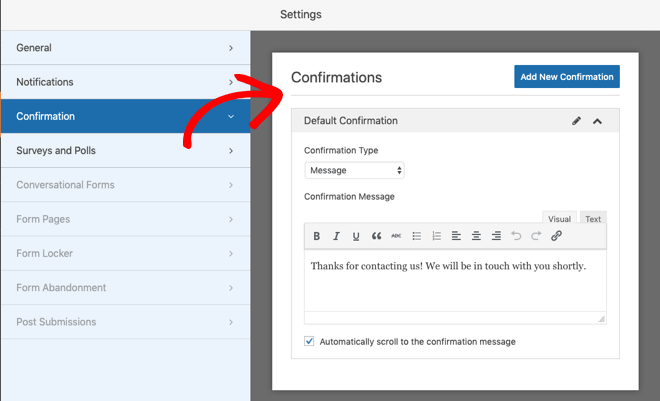
You can choose from 3 types of confirmation when a user submits a contact form:
- Message – Displays a simple confirmation message.
- Show Page – Takes visitors to a thank you page on your site.
- Go to URL (Redirect) – Sends visitors to a page on another website.
When you’ve completed the confirmation settings, click Save.
How to Add Your Contact Form in WordPress
Now you’ve finished creating your contact form, you’re ready to add it to your site.
Let’s take a look at 3 places where you can add your contact form.
1. Add Your Contact Form to the Contact Page
The first place to add your contact form is the Contact page. You can either edit your existing contact page or create a new one.
Here’s how to add it to your Contact page using the Gutenberg Block Editor.
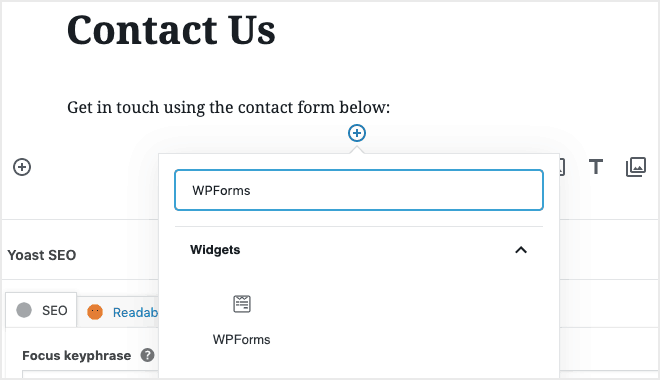
Go to the block where you want to add the contact form and click on the “+” icon. Search for WPForms and click on the WPForms icon to add it to the block on your page:
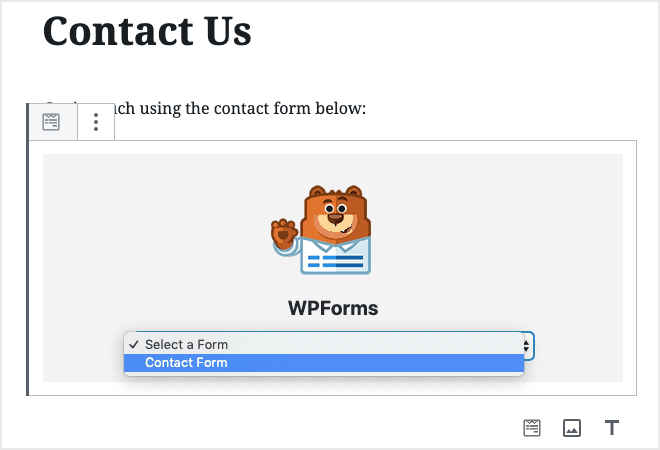
Now, select your contact form from the WPForms dropdown:
Save your draft and preview the page:
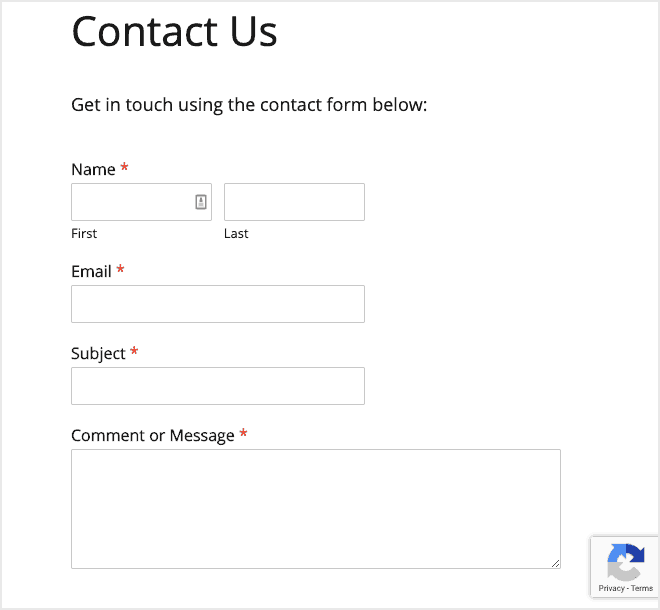
Note: In this example, you can see the reCaptcha option enabled in the bottom right corner.
2. Add Your Contact Form to a Page or Post
The next place you might want to add your contact form is another page or post. For example, if you had a Services page that described your services and asked potential clients to contact you.
Rather than linking from your Services page to your Contact page, you could embed the contact form directly on the Services page.
Here’s how to add the contact form to your Services page using the Gutenberg Block Editor.
Find the place on your page where you’d like to insert the contact form. For example, it would make sense to embed the contact form after you’ve asked people to get in touch:

When you have the right place, follow the same steps as above to select and add the WPForms Block.
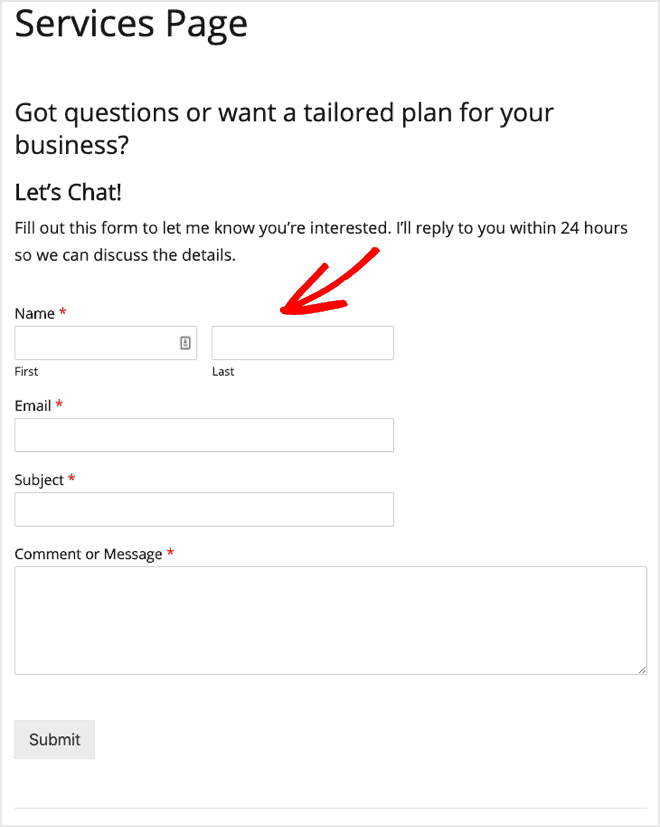
For example, here’s how the contact form might look on your Services page after you’ve asked people to contact you for more information:
3. Add Your Contact Form to the Sidebar (or Widget Area)
WPForms includes a widget that allows you to add your forms to a sidebar or any other widget area in your theme, for example, the Footer widget area.
Here’s how to add your contact form to the sidebar widget.
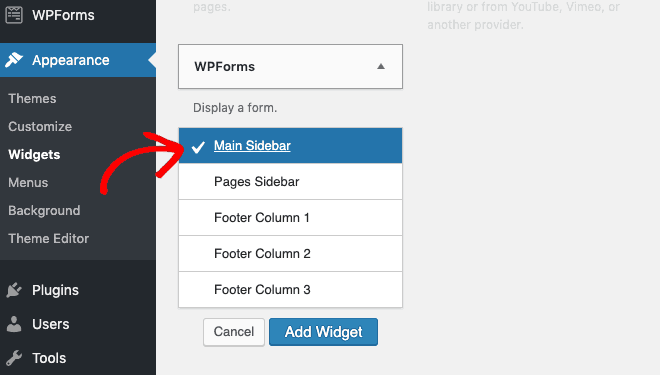
In your WordPress admin dashboard, go to Appearance > Widgets. You’ll see a WPForms widget that you can add to any Widget Area of your theme.
For example, select your main sidebar from the list of options, and click the Add Widget button:
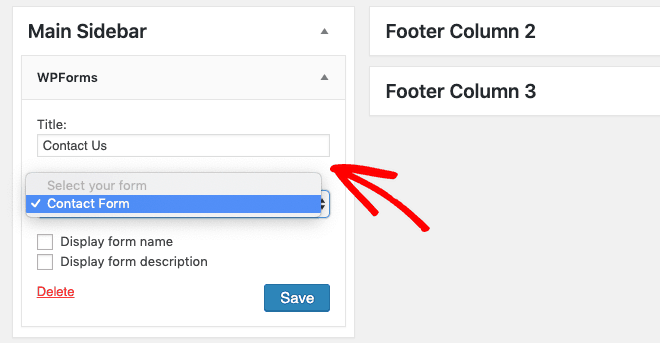
Next, add the title for your widget and select the form you want to display:
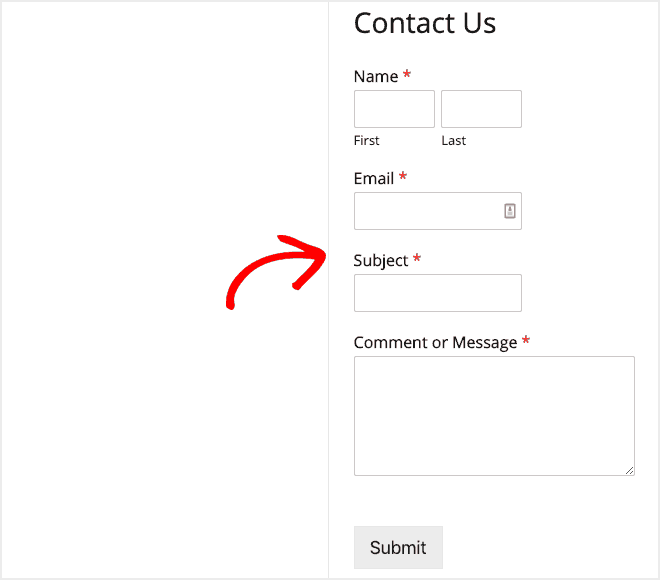
Save the settings, and visit your website to check how it looks in the sidebar:
Remember, you can use the same steps to add your contact form to any widget area on your site. These vary from theme to theme, but most likely you’ll have widget areas in the sidebar and the footer area.
How to Track Your Contact Form Conversions with MonsterInsights
Now that you’ve added a contact form on your site, you’ll want to know how it’s performing.
And the easiest way to track your contact form performance is with MonsterInsights, the best Google Analytics plugin for WordPress.

MonsterInsights includes a Forms Addon that automatically tracks your form views and conversions.
If you haven’t installed MonsterInsights yet, then follow our step-by-step tutorial.
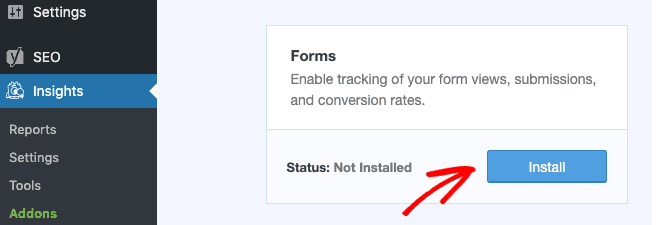
After you’ve installed MonsterInsights, go to Insights > Addons, locate the Forms addon, and click the Install button:
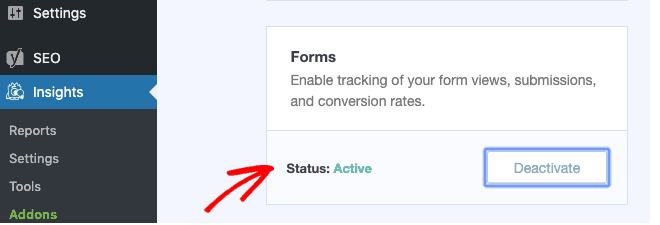
Once installed, you’ll see the status change to Active:
And that’s all you need to do!
MonsterInsights will now start tracking your forms automatically. You can check their performance in the Insights Reports:
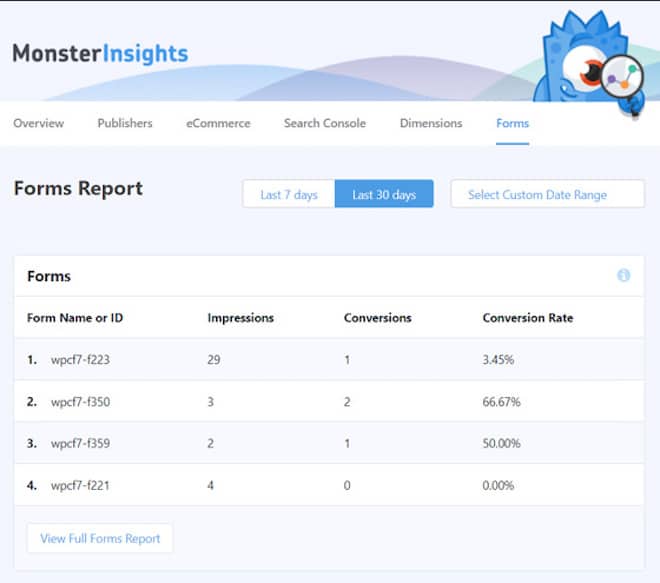
For each form, you can see which is receiving the most views and conversions, and compare the conversion rate.
Be sure to also check out our guide on how to install Google Analytics on WordPress.
Wrapping Up
Now you know how to create a simple contact form in WordPress using WPForms and add it to your site! Plus, you know how to track the success of your contact forms using MonsterInsights.
Need some inspiration before you create your own? Check out our roundup of the best contact us pages on the web for more ideas.
Let us know if you have any questions about creating and installing your contact form. And be sure to tell us how your contact form is performing in the comments below.


thanks for sharing this post… it’s a very useable one for our business.