How to Schedule Your WordPress Posts to Publish Automatically
A short tutorial on how to schedule your new posts to publish automatically at a specific date in the future by using the calendar feature in WordPress.
How blog post scheduling works
WordPress has an in-built feature in its calendar which allows you to schedule your blog posts on a certain date and time. You don’t need to manually publish each blog post. Rather, you set a publish time and your posts would automatically be live. It makes publishing a lot convenient.
Why you should schedule your blog posts
Before you learn how to schedule blog posts, here are some reasons to help you understand how auto-publishing and scheduling could be useful.
-
Publishing consistency
If you follow a strict publishing timeline on your blog, say weekly or monthly, then scheduling can help you set a time for all the posts at once. Your audience will receive all your scheduled posts at the perfect time. That’s it. -
Time-zone and audience priority
If your audience is from a region that’s different than yours, then it might not receive your updates at the ideal time, so you might miss out some of their attention. Scheduling can help you encounter this problem by publishing your posts right when your audience is online. -
Batching for future
If you won’t be able to manage your blog for a certain period due to a vacation, internet problems or any other interruption, then your blog might lose consistency. However, keeping a few posts scheduled in advance can save the day for you.
Overall, you can make scheduling work for you depending on your blogging calendar, audience, etc. and automate the publishing process.
How to schedule your blog posts
If you’ve decided that you want to schedule your blog posts or want to see how it works, then follow the next steps to do it. Consider that you already have a publish-ready post in your drafts and you want to schedule it for auto-publishing.

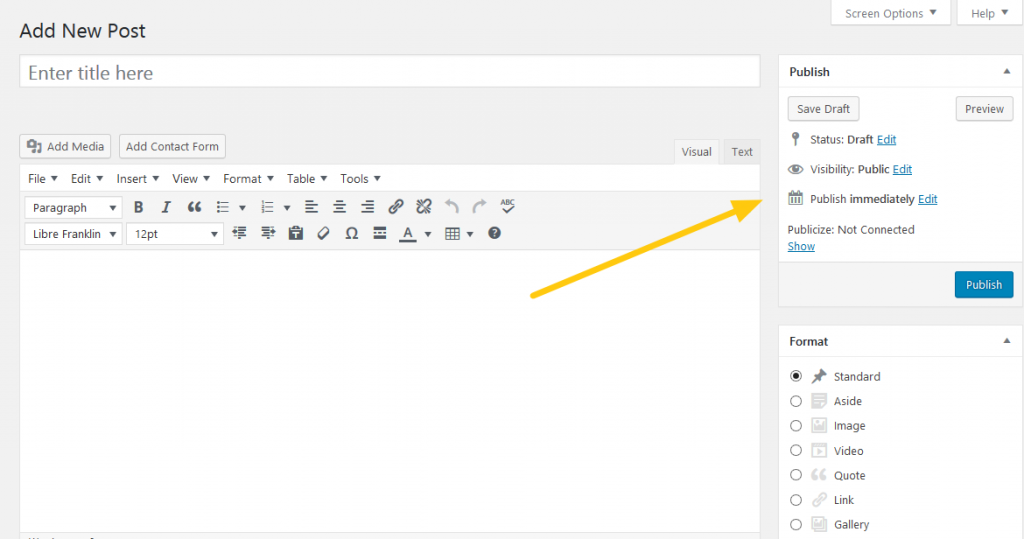
Firstly, find the Publish section and see that the default option is ‘publish immediately.’ You need to change that for scheduling your post.
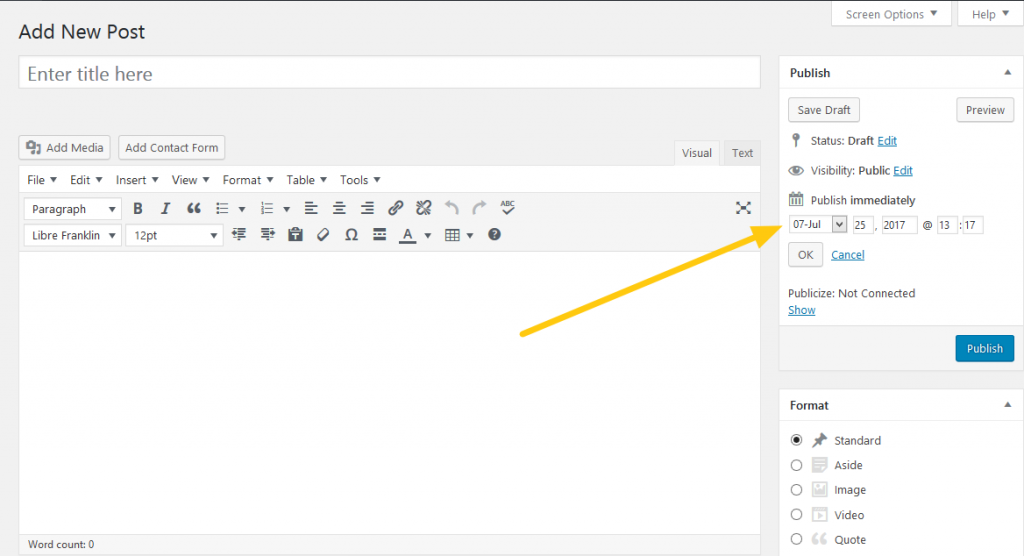
Near the Publish immediately option > click on edit. This would make the month, date, year and time options appear.

After this you can change the date and time to your preferred publishing time and click OK > followed by Publish, after which your post will be published at the scheduled time.
You’re done.
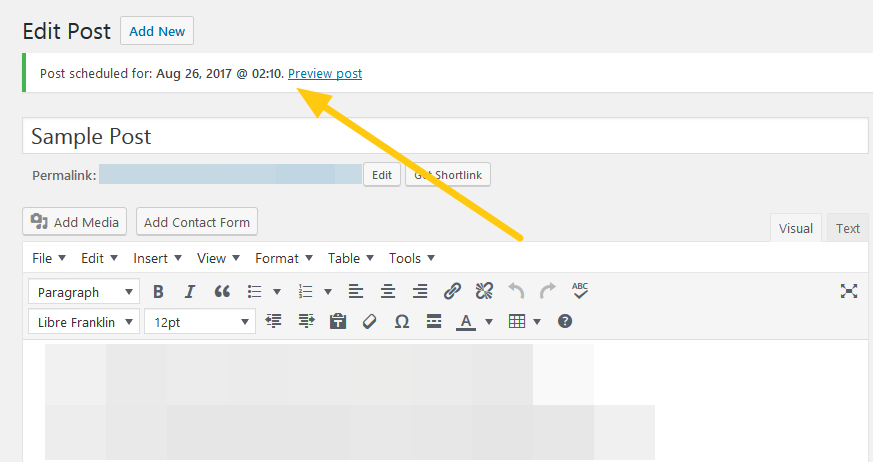
You’ll see a notification on your screen telling you when your post will be published.

Some quick tips
Now that you know how to schedule your blog posts, here are a few other tips you should take a note of.
-
Backdating
You can backdate your existing blog post thorough calendar, for archive appearance and other purposes. -
Republishing
You can republish you old blog posts by changing their status from Published to Drafts and then publishing them again to share them with your audience. -
Changing publish time
If you’ve already set a publish date and want to change it, then you can implement changes any time before the post goes live.

